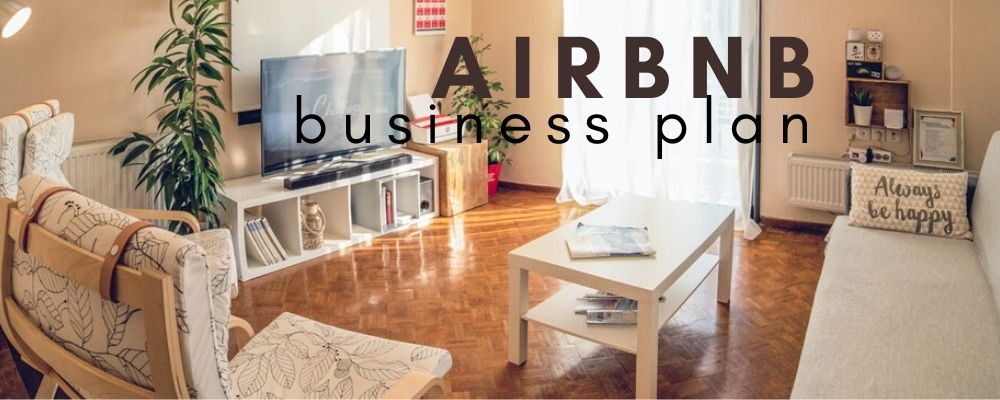
Airbnb Business Plan
Excited to learn about Airbnb here you go, you're going to learn how to start an Airbnb business, get it up and running in 24 hours, and all it's going to take is 10 simple steps. If you were a graduate of any business school, one of the things you'd be thinking about is to start a successful Airbnb short-term rental business, you would need to have an Airbnb business plan. However, I'm going to show you how to start an Airbnb short-term rental business, how to make money with Airbnb, and how to begin collecting your Airbnb income all within the next 24 hours.
10 simple steps to follow for Airbnb Business Plan
Now here's my little caveat, it's not to say that you're going to start cashing checks or getting deposits in 24 hours. However, if you follow my steps, you can get your first booking within the next 24 hours. So with that said, let's go. (dreamy music) , Oh, and one other thing I forgot to mention is there's going to be eleven, eleven steps because I'm adding a bonus step at the end, that's an insider hack that most people won't tell you about but it's going to help you to begin getting your revenue a lot faster than most people get on Airbnb. Okay, so stick with me to the end and you're going to see how much you'll be rewarded with that bonus.
Set up your Host Account :
First things first, to get started you do need to have space for your guests to stay and that could be a room, it could be an apartment, it could be a trailer, but as long as it's comfortable, safe, clean, and inviting, you'll be able to implement your Airbnb strategy. Step number one, set up your host account. To get started with Airbnb, one of the things you're going to need is a hosting account. https://www.airbnb.co.in/host/homes When you click that link, it'll take you to the Airbnb website, directly to their host account and I believe it also provides you with a, an incentive bonus for you to get started. When you're setting up your Airbnb host account, they're going to require you
· to upload a photo
· they're going to want your name
· your address
· your bank account information.
Now the beauty of that is, you'll never have to collect any money from a guest. Airbnb will collect all the money from the guests before check-in and 24 hours after check-in, they will deposit it, electronic funds into your account. So that's something you want to make sure you do and make sure it's done properly. That information is all secured inside of Airbnb platform and no one will get it.
Add your bio:
Step number two, add your bio. After you've added all of your sensitive information to include name, date of birth, image, bank account, you're going to want to add your biography, you want to create a nice little biography about yourself so that when guests are looking at you, they're going to see what it is you want them to know about you, so you want to make it nice, warm, and inviting.
Take pictures of your living place:
Step number three, take a couple of decent pictures of your living space. Now, when it comes to pictures you'll see a lot of people telling you that you have to have professional photos shot, it's not true, if you do the optimization right of the listing, then it doesn't necessarily need to have great, great photos, but you also don't want them to be horrible either. So what you can do, is use your cell phone, typically our cell phones have cameras that are more than adequate and all you need to do is turn on all the lights in the home, turn on all the lights in the room that you're taking images of, open up all the window dressing so that you're getting natural light in and then just take a couple of pictures.
Typically, you want to stand in the far corner of the room, in the far corners of the room to get the best images. Now, take an image of the bedroom, take an image of the kitchen, take an image of the bathroom, and take an image of the exterior. Four images to begin and then you can move on because you're going to get back and you're going to be able to add later, but you don't want to have to be so concerned about all the images to get yourself up and running online, okay, get your listing up and running.
List your space :
Step number four, you're going to list your space. Now that you've set up your host account, you're going to have the ability to go into Airbnb and list your property. Now when listing your space, you need to decide if you, if you are listing a private room inside of your home, or your apartment, or inside of your, your camper. Before you list your property, you need to determine if you're going to have a shared housing arrangement or if you're hosting the whole space for the guests to stay. If it's a whole space, you're going to list the bedrooms, the kitchen, the living room, the dining room, the bathroom, so you're going to add those as part of the space if it's the whole house, you're also going to add the different amenities as well, such as, if you offer laundry, if you offer free parking, if you have a pool, those kinds of things.
If it's shared space, meaning you're giving the guests a private room where they'll have a lock and a key and they will be sharing the common areas such as the bathroom, the living room, the kitchen, then what you're going to do is you're going to still put the address of the home and then you're going to list the space with one bedroom. Along with the one-bedroom, you're going to still list all the shared areas, so the kitchen, the living room, the bathroom. As well as all the amenities, as I mentioned earlier. Now here's the thing, if there's more than one bedroom and you're looking to list each bedroom separately after you finish that listing, then you would copy the listing and create a new listing and you would name that room two. So you would have room number one with all the amenities, same address, just be listed as room number one inside of that address, and then you would have room number two, all the amenities, same address and if you have more than two rooms, then you would do the same thing and the same thing.
Now many people ask me, why would someone want to share space? Why would someone do that? Well, I can tell you, many of my listings are shared housing, right, but think about this and so I know it works, I know that there's a niche but it really isn't something that takes a genius to figure out because think about most people that have their places on Airbnb, most people that have their places on Airbnb are people that have a home, maybe just like you or an apartment, maybe just like you and they're just looking to earn a few extra bucks off of their extra space that they're not using and so when they're welcoming guests, guests are coming in expecting to be staying with the person that lives in that home, so most guests that are coming in to Airbnb are living in those shared spaces, the only difference is, with what we do, is that when we pick up properties, we're picking up properties and we're making all the spaces shared, except for the bedroom, so they're private rooms inside of the space and they're sharing with other like-minded business travelers that are coming, for purpose, to your town and they're looking for an affordable, clean, comfortable and safe space for them to sleep and shower, as if they were in a hotel but the difference is they're not paying hotel prices.
Publish your listing and put it on snooze :
So step number five, now you're going to publish your listing and put it on snooze. Now the reason why you're going to put it on snooze is that remember, we only added four photos, four or five photos to the listing, so the listing is not exactly what we want. However, we don't want our listing to have to wait until we get all the photos uploaded or taken. So remember, I said we're going to get up and running in 24 hours, right? So what we're going to do is, once you get all the details into your listing, you're going to hit the publish button and once you've published it, all you're going to do now is put it on snooze.
So now no one can see the listing because it's on snooze and what this does, it now allows you to optimize the listing but now you're listing is actually, it's life but no one can see it.
Optimize the listing :
Step number six, now it's time to optimize the listing. The optimization of your listing is a key factor in your getting great placement inside of the Airbnb algorithm. Now, many people will say you have to have professional photos, it's not true. The key is, if you describe your listing well, properly, if you have good prices, if you take decent images so they can get a good enough feel for what's there, most people will book and if you write your bio properly, most people could care less if the images are professionally done or not.
As far as optimization of the images, a couple of things you do want to do, you want your first photo to be really good, right? So your first photo, you want it to be a good one, one of the other things you want to do, you want to go to Google and you want to pick up some nice photos, some images that you can use, that depict the area that people are coming into. So if you're in New York, you want to maybe get some landscape shots of New York, some nice skyline shots of New York, if you're in Boston, you would do the same thing and maybe some of the things that people are coming there for, or when they get there maybe they might want to visit, the Statue of Liberty, the Empire State Building, you know, things like that, and you want to add those to your listing.
What you also want to do is you want to add the descriptions to your listing as well. So, and when you go back and take the rest of the pictures and begin uploading them into your listing, what you want to do is you want to have your photos in a way that when people are looking at your listing, it kind of walks them through the house. So you might want to show your exterior first and then the bedroom and then the kitchen and then the living room and the bathroom.
So you can decide on the best way that you feel works for you and you always want to have your best image first, and when you do that and you do it properly, what's going to happen is when you publish your listing, the Airbnb algorithm takes notice of people that are on their website, looking at all the listings, and the things that they are looking for, when they're going through your listing, if they slow down on the listing or they click on the listing, Airbnb, their algorithm recognizes that.
The more engagement you have in that, on that listing, the more they're going to serve up that listing. You should give your listing a good title, what I always tell people is, be descriptive with your titles. Your titles you want, for instance, you know, beautiful private room inside of a warm home, right? Or cozy, quaint, private room near whatever the landmark is, and so whatever those things are, that people are coming for, the attractions of your particular city, you want to add that to your title.
So for instance, if you're close to that or if you're near, you know, near enough so that you're not being deceptive about it, you would say lovely home, very close to Madison Square Garden, or very close to the university, right? And you just name, you know, whatever that landmark is, so that's very important as it relates to part of the optimization, very, very important, inside of that, that title you want to have something nice and descriptive, but you also want to tag inside of that title, the draw, you know, something in that area that's a big draw and a big reason why people do come. So that way, when people are doing their searches, not just on Airbnb, but also in Google, when they're doing their searches because you've tagged it in your title, then they're more likely to find you versus someone else that just says nice private room in Rochester, okay?
Welcome your first guest :
Step number seven now that you've optimized your listing properly, what you're going to do next is, you're going to determine when you want to welcome your first guest. Now at this point, remember because we're trying to get this up and running within 24 hours, most likely, you're not going to be ready to welcome your first guest in the next 24 hours, however, you want to have your listing live, right? Let me tell you why, because once it's life, what you're going to do is you're going to determine at this stage.
When do you want to welcome your first guest? That might be a week from now, might be two weeks from now, depending on your schedule, when you're going to be there when you're not going to be there and/or when you're going to have space ready and available for them to come right? So if, say it's going to take you three or four days, what you're going to do is you're going to go into the calendar of Airbnb, you're going to block off that three, four, five days, however long you need and that's it, and then what you're going to do is you're going to un-snooze and finish publishing your listing.
So now the beauty of that is, while you're getting your listing up and running right, and prepared for to welcome your guests, Airbnb is serving it out and letting everyone know that it's ready for them and the first day they can book would be five days from now, right, or whatever the day you set, and so now, it's being served up to people that are looking for listings in your area and you're going to be able to start getting bookings and inquiries immediately, right?
So think about it, when someone books, what do they have to do? When you approve them, they have to pay Airbnb right there, right then and there, they don't wait until they get here to pay Airbnb, they pay them as soon as you approve that booking, that's money in the bank pretty much because once they arrive, Airbnb will then electronically deposit the funds that they've collected into your account.
Watch the Activity :
Step number nine is to watch the activity on your account. You're going to watch it and you're going to see how people are going to start making inquiries right away. They're going to start inquiring about your space and all you're going to do on your app, right? This is also one of the steps if I didn't tell you, which I apologize, you should download the app. Once you create your listing, download the app onto your phone, that's going to save you a ton of time, right? But you're going to be watching the app and you're going to be responding to those inquiries on your app, right?
So that's it, you don't need to have your computer, it's best to set up your listing on your computer, but then after that, you want to download the app, okay, and again to set up your host account, I provided a link right here and then you can go right over to Airbnb.
Watch the Money :
Step number ten is going to be, to watch the money start to rack up inside your account. Now, you're not going to get your EFT deposits until 24 hours after they check-in, however, here's a little something that most people don't know, which could be a little bit of a bummer, but if you get caught with this, and you weren't expecting it and that is what? Airbnb, when you first set up your account, they wait 30 days to deposit your first transaction into your account, and then every day every transaction after that will come in 24 hours after your guest checks in, it's one of their security measures that your first payment, you won't get until 30 days after your first booking.
Here is a Bonus, you are looking for :
I promised you I am going to give you a hack. Here's a hack on how that you can speed that process up. So one of the things you can do, remember when you put your listing on snooze, remember it is life, no one can see it though, right? So what you want to do, is if you have a friend or family member that doesn't live in your residence, they can go on and book for one day, for that day you can even drop your price right? So they can book and what it is, is you're going to utilize that as a way for you to do a couple of things, one, get familiar with how that online process works, two, you'll be able to get your first review, because, after the book, they'll also be able to leave your review, which is very important?
Getting those reviews makes a big difference when someone else is looking at your listing. So when they see reviews, it just makes them more comfortable. So when they see positive reviews, they'll be able to leave you a positive review, and then lastly your 30-day clock for your payment window is starting to run, so after they've booked, they've checked in, that $20 or however much they paid to book your room, your home, or your space, Airbnb has collected that and now they're running the clock, right? And so if it takes you another five days or seven days or 10 days to get your listing set up so that you can start welcoming your other guests, then your clock has already started running, amazing right?
You don't have to wait until you welcome another guest before that 30-day clock runs. So if you take another 10 or 15 days and do that and you welcome your first guest, in 15 days you welcome that first guest, now you only have to wait 15 more days for your payment to come, why? Because you've already spent the first 15 days of your probationary period on that first guest, so that's a great hack and then after the total 30-day period is up, every time you book, like everything else that was booked will start coming in 24 hours after they check-in. And so that's the beauty of Airbnb and what's nice is when you start getting comfortable and familiar with how to welcome your guests and how to communicate and you start seeing how that cash flow comes in with Airbnb, you're going to want to begin adding more listings.
I love most about the rental arbitrage strategy is that you don't have to own property to have listings on Airbnb. You can rent out more space and then you can get Airbnb rental income from that space, in most cases if you use the right formula, is much more than what you would pay to rent that space. Typically what I get, is double to triple what I'm renting the space for, so if I'm renting out a whole house and I'm paying $1,200 for that home, I'm at a minimum going to be getting $2,400 from Airbnb so I can pay the rent, 1200, and then I keep 1200 for myself, minus, you know, the utilities or any other fees and then the other thing is, when you set up your listing properly, you're going to add a cleaning fee that covers what you're going to be paying your cleaner or paying yourself, or paying your son or your daughter.
You're going to be adding the cost to take care of that, so that doesn't affect your overall income. You're not necessarily looking to make money on your cleaning, but what you want to do is you want to add the cost so that it offsets your expense and most Airbnb guests are used to that, so as long as your fees are reasonable, then it's not going to pose a problem.
So that's how you start your Airbnb business in 24 hours, getting it up and running in just 10 steps, thank you for reading, God bless you.